Team Voice Calls Admin Guide
- Print
- DarkLight
- PDF
Team Voice Calls Admin Guide
- Print
- DarkLight
- PDF
Article summary
Did you find this summary helpful?
Thank you for your feedback
.jpg)
The Team Voice Calls feature is currently in beta. Report any issues to QuickMeet.Chat support.
Setting up Team Voice Calls in QuickMeet.Chat involves deploying and integrating a FreeSWITCH server, which serves as the backbone for managing the VoIP functionality. This guide provides clear steps to deploy and configure FreeSWITCH with your QuickMeet.Chat workspace as an administrator.
To get started, contact our Sales team to purchase the add-on and receive the configuration files. This includes a Docker image file and the docker-compose.yaml file for deploying the FreeSWITCH server. Since Team Voice Calls is an add-on, these configuration assets are available only to customers subscribed to the service.
In this guide, you’ll learn the following:
Deploying the FreeSWITCH server
Prerequisites
A dedicated server to deploy FreeSWITCH, with a domain pointing to its IP.
Docker installed and operational on the server
To deploy FreeSWITCH, continue with the following steps:
Download the Docker image (
fs-image-beta-1.1) anddocker-compose.yamlfile from QuickMeet.Chat’s VoIP package.
Navigate to the directory with the downloaded files and run this command to load the image:
docker load -i fs-image-beta-1.1Run
docker imagesto verify that the freeswitch image was loaded correctly.
Deploy the FreeSWITCH container by running this command in the directory containing the
docker-compose.yamlfile.docker compose up -dTo verify that the container is running, start it and enter the OS bash with:
docker exec -it freeswitch bashOnce inside, check if FreeSWITCH is active by running
fs_cli. The response is similar to the image below, depending on your configurations:
You’ve successfully deployed your FreeSWITCH server. The next step is to configure it within your QuickMeet.Chat workspace to enable team collaboration VoIP functionality.
Configure FreeSWITCH in QuickMeet.Chat
After successfully deploying your FreeSWITCH server, the next step is to configure it within your QuickMeet.Chat workspace. This process requires enabling certificates on your FreeSWITCH server and connecting it to QuickMeet.Chat to support secure communication.
Enable certificate on FreeSWITCH
To allow communication between QuickMeet.Chat and FreeSWITCH, enable the SSL certificate for your FreeSWITCH server on your browser:
Enabling this certificate allows the browser to accept communication between QuickMeet.Chat and your FreeSWITCH server. This setup only needs to be done once per browser, and you won’t need to repeat it unless you’re using VoIP on a different browser.
Go to https://<your-freeswitch-domain>:7443 in your browser. A warning appears about an invalid certificate (
ERR_CERT_AUTHORITY_INVALID).
Click Advanced, then select Proceed to
<your-domain>(unsafe) to bypass the warning.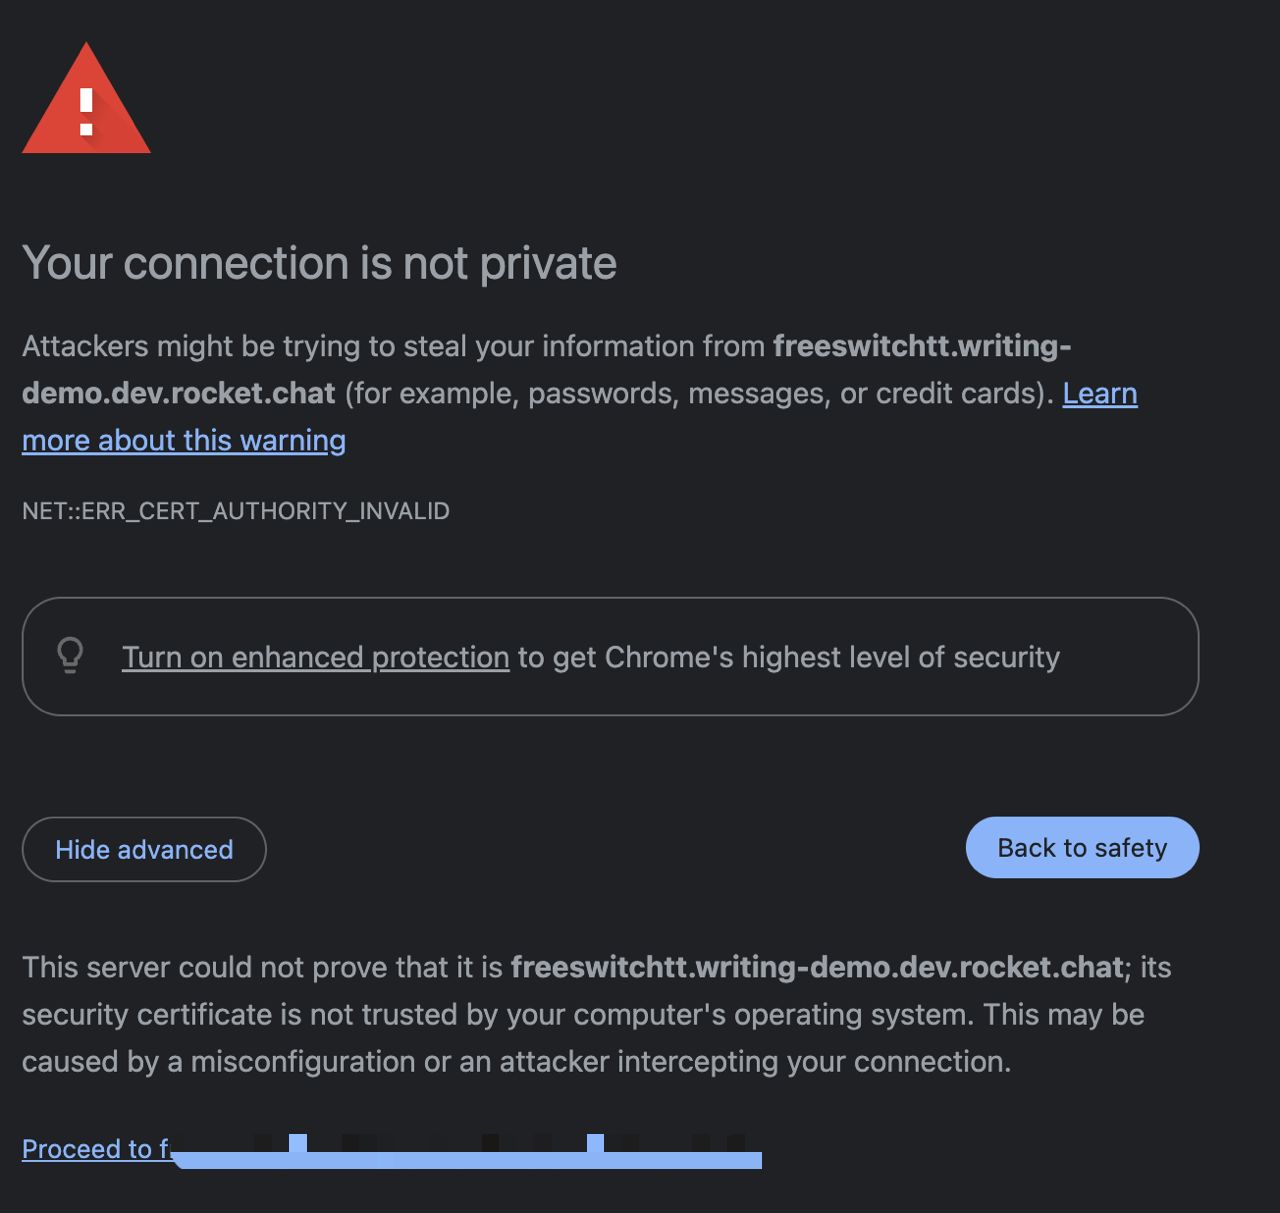
The page loads, returning an
HTTP ERROR 400message, confirming the certificate is enabled.
Connect QuickMeet.Chat with FreeSWITCH
With the certificate enabled, you can now proceed to configure QuickMeet.Chat to connect with FreeSWITCH using these steps:
In your QuickMeet.Chat workspace, navigate to Administration > Workspace > Settings > Team Voice Calls.
Update the following settings:
Field
Description
FreeSwitch Host
The domain of your freeswitch server.
FreeSwitch Port
The FreeSwitch port. By default, it is 8021.
FreeSwitch Password
The FreeSwitch password will be provided to you alongside the Docker image and configuration file.
FreeSwitch Request Timeout
The time it takes for the server to time out. By default it is, 3000.
WebSocket Path
The WebSocket Path follows this example
wss://<your-domain>:7443/Click Save Changes.
Configure VoIP permissions
To use VoIP efficiently, certain permissions must be assigned based on user roles:
Workspace admin/VoIP managers require the
Manage VoIP Extensionspermission to administer VoIP settings and extensions.VoIP users require the
View User VoIP ExtensionandView VoIP Extension Detailspermissions.
It's recommended to create custom roles for these permissions and assign them to the appropriate users.
Assign extensions to users
Once FreeSWITCH is connected, assign extensions to users in your QuickMeet.Chat workspace. Each extension represents a user on the FreeSWITCH server, enabling them to make and receive voice calls. By default, 19 extensions (1001 - 1019) are available in the workspace.
To assign an extension to a user:
Go to Administration > Workspace > Users.
Click Assign Extension in the top-right corner.
Choose the User and select from the Available Extensions, then click Associate to assign the extension.
Alternatively, you can assign an extension by clicking the kebab menu next to the user in the user list and selecting Assign Extension from the options.
To unassign an extension:
Click the kebab menu next to the user in the list.
Select Unassign Extension and click Remove.
If you're using LDAP, you can automatically assign user extensions by mapping the Extension Field setting. Ensure this attribute is configured in your LDAP mapping; otherwise, extensions will need to be assigned manually.
Great job so far! —With FreeSWITCH deployed and configured, users with assigned extensions can now make and receive calls within QuickMeet.Chat. In the next section, you’ll learn how to make the most of these calling features, including placing, receiving, and managing calls within QuickMeet.Chat.
Was this article helpful?