Microservices
- Print
- DarkLight
- PDF
Microservices
- Print
- DarkLight
- PDF
Article summary
Did you find this summary helpful?
Thank you for your feedback
.jpg)
Deploying QuickMeet.Chat using microservices enhances scalability and error handling in your workspace. By breaking down QuickMeet.Chat into targeted services, each component can efficiently manage its tasks, improving performance and ease of maintenance.
The official method for deploying QuickMeet.Chat microservices is with Kubernetes and Helm. Visit the Deploy with Kubernetes guide to gain essential background knowledge this deployment.
In this document, you'll learn:
Key components of the QuickMeet.Chat microservice architecture
How to configure microservices components in your Kubernetes deployment
A step-by-step guide on deploying a workspace using QuickMeet.Chat microservices
Key components of QuickMeet.Chat microservices
QuickMeet.Chat’s microservices architecture consists of several components, each focusing on a specific feature. These components work together to form a fully operational QuickMeet.Chat workspace. Here are the key components:
authorization (
rocketchat/authorization-service): Manages role and permission validation, ensuring that users have the right access levels.nats (
docker.io/nats): A messaging system that provides a scalable and highly available message bus for microservices communication. It acts as a message distributor, i.e., you point to the distributor instead of pointing to each component in the deployment resource. This determines the service to forward the requests.To learn more about NAT, see the official documentation.
stream-hub (
rocketchat/stream-hub-service): Functions as a message broker that provides a scalable and fault-tolerant message stream for QuickMeet.Chat. It receives real-time changes or data from MongoDB and sends it to all the services. The services can act on that change at their discretion.accounts (
rocketchat/accounts-service): Manages user accounts and authentication.ddp-streamer (
rocketchat/ddp-streamer-service): Handles all WebSocket connections using the Distributed Data Protocol (DDP).presence (
rocketchat/presence-service): Manages user presence status.The central QuickMeet.Chat monolith (
rocketchat/quickmeet.chat): Each component is disabled from this monolith, so each "service" can take over its respective functionalities.
QuickMeet.Chat's microservices deployment is illustrated in the diagram below. From a bare metal perspective, each component consists of one container.
.png "image(48).png")
Configuring the microservices component
It is essential to note that we do not support direct Docker microservices deployment. The official supported method to deploy QuickMeet.Chat microservices is by using Kubernetes with the official Helm chart. Refer to the Deploy with Kubernetes guide for more details on our kubernetes deployment procedure.
To configure QuickMeet.Chat microservices in your Kubernetes deployment, enable microservices in the values.yaml configuration file.
microservices:
  enabled: true
By default, the QuickMeet.Chat Helm chart deploys a single monolith with a single instance. To deploy multiple replicas of the microservice, add the replicaCount as shown below:
replicaCount: 2

microservices:
  enabled: true
Alternatively, you can also set the desired number of replicas for any of the services as shown below:
microservices:
  enabled: true
  presence:
    replicas: 1
  ddpStreamer:
    replicas: 2
  account:
    replicas: 1
  authorization:
    replicas: 1
  streamHub:
    replicas: 1
  nats:
    replicas: 1
ddp-streamershould be scaled from the beginning. Aim for one pod for every 500 concurrent users.
stream-hubis the only service/component that can not be scaled and is limited to one pod for each deployment.
Set up ingress
This architecture requires an ingress controller. All WebSocket connections need to be sent directly to the ddp-streamer service. You can use any ingress controller, for example NGINX. To install an NGINX controller, follow this guide and update your values.yml file with the following configuration:
host: # the host to access your QuickMeet.Chat instance, omit the protocol

ingress:

  enabled: true

  ingressClassName: nginx
This configuration sets up the necessary ingress resource with the appropriate paths and backends. The ingressClassName is critical unless you have a default class set. Consult your ingress controller's documentation for specifics.
While NGINX is used as an example, any ingress controller can be employed. Ensure the
ingressClassNameis correctly configured or that the IngressClass resource is set to the default for your cluster, allowing the controller to manage Ingress resources without a specific class defined.
Deploying QuickMeet.Chat Microservices with Kubernetes and Helm
Before proceeding, refer to the Deploy with Kubernetes guide to set up the prerequisites and gain foundational knowledge on the Kubernetes deployment procedure.
Once you've confirmed that all prerequisites are met, continue with the following steps to deploy QuickMeet.Chat microservices using Kubernetes:
Add the chart repository
Add the QuickMeet.Chat helm chart repository by running the following command:
helm repo add rocketchat https://rocketchat.github.io/helm-chartsIf successful, it returns a response that "rocketchat" has been added to your repositories.
Define the deployment configurations
To install the QuickMeet.Chat with the chart, define your configuration options in a values.yaml file. Kindly refer to the configuration section to learn more about the deployment configurations you can set in your values.yaml file. However, let’s create an example file to proceed with this guide:
Create values.yaml file with the following content to define the configurations that Helm will use for your deployment:
image:
  pullPolicy: IfNotPresent
  repository: registry.quickmeet.chat/rocketchat/quickmeet.chat
  tag: <release>

mongodb:
  enabled: true  #For test purposes, a single mongodb pod is deployed, consider an external MongoDB cluster for production environments
  auth:
    passwords:
      - rocketchat
    rootPassword: rocketchatroot

microservices:
  enabled: true
  presence:
    replicas: 1
  ddpStreamer:
    replicas: 1
  account:
    replicas: 1
  authorization:
    replicas: 1
  streamHub:
    replicas: 1
  nats:
    replicas: 1

host: domain.xyz
ingress:
  enabled: true
  ingressClassName: nginx  # State the ingress controller that is installed in the K8s cluster
  annotations:
    cert-manager.io/cluster-issuer: production-cert-issuer # Replace with the name of your ClusterIssuer
  tls:
    - secretName: rckube #This is the name of the secret - You can use a different name if needed
      hosts:
        - domain.xyz #This is the domain for your QuickMeet.Chat server, Replace it with your own domain
Replace the
<release>with the QuickMeet.Chat release tag you want to deploy.Update domain.xyz with your domain name
Optionally, you can use a different
secretNamefortls.Ensure that the appropriate
ingressclassNameand cluster issuer are specified.
Install QuickMeet.Chat
Now that you’ve defined the configurations in values.yaml, install QuickMeet.Chat with the following command:
helm install rocketchat -f values.yaml rocketchat/rocketchatIf your deployment is successful, you’ll get a response similar to the following:
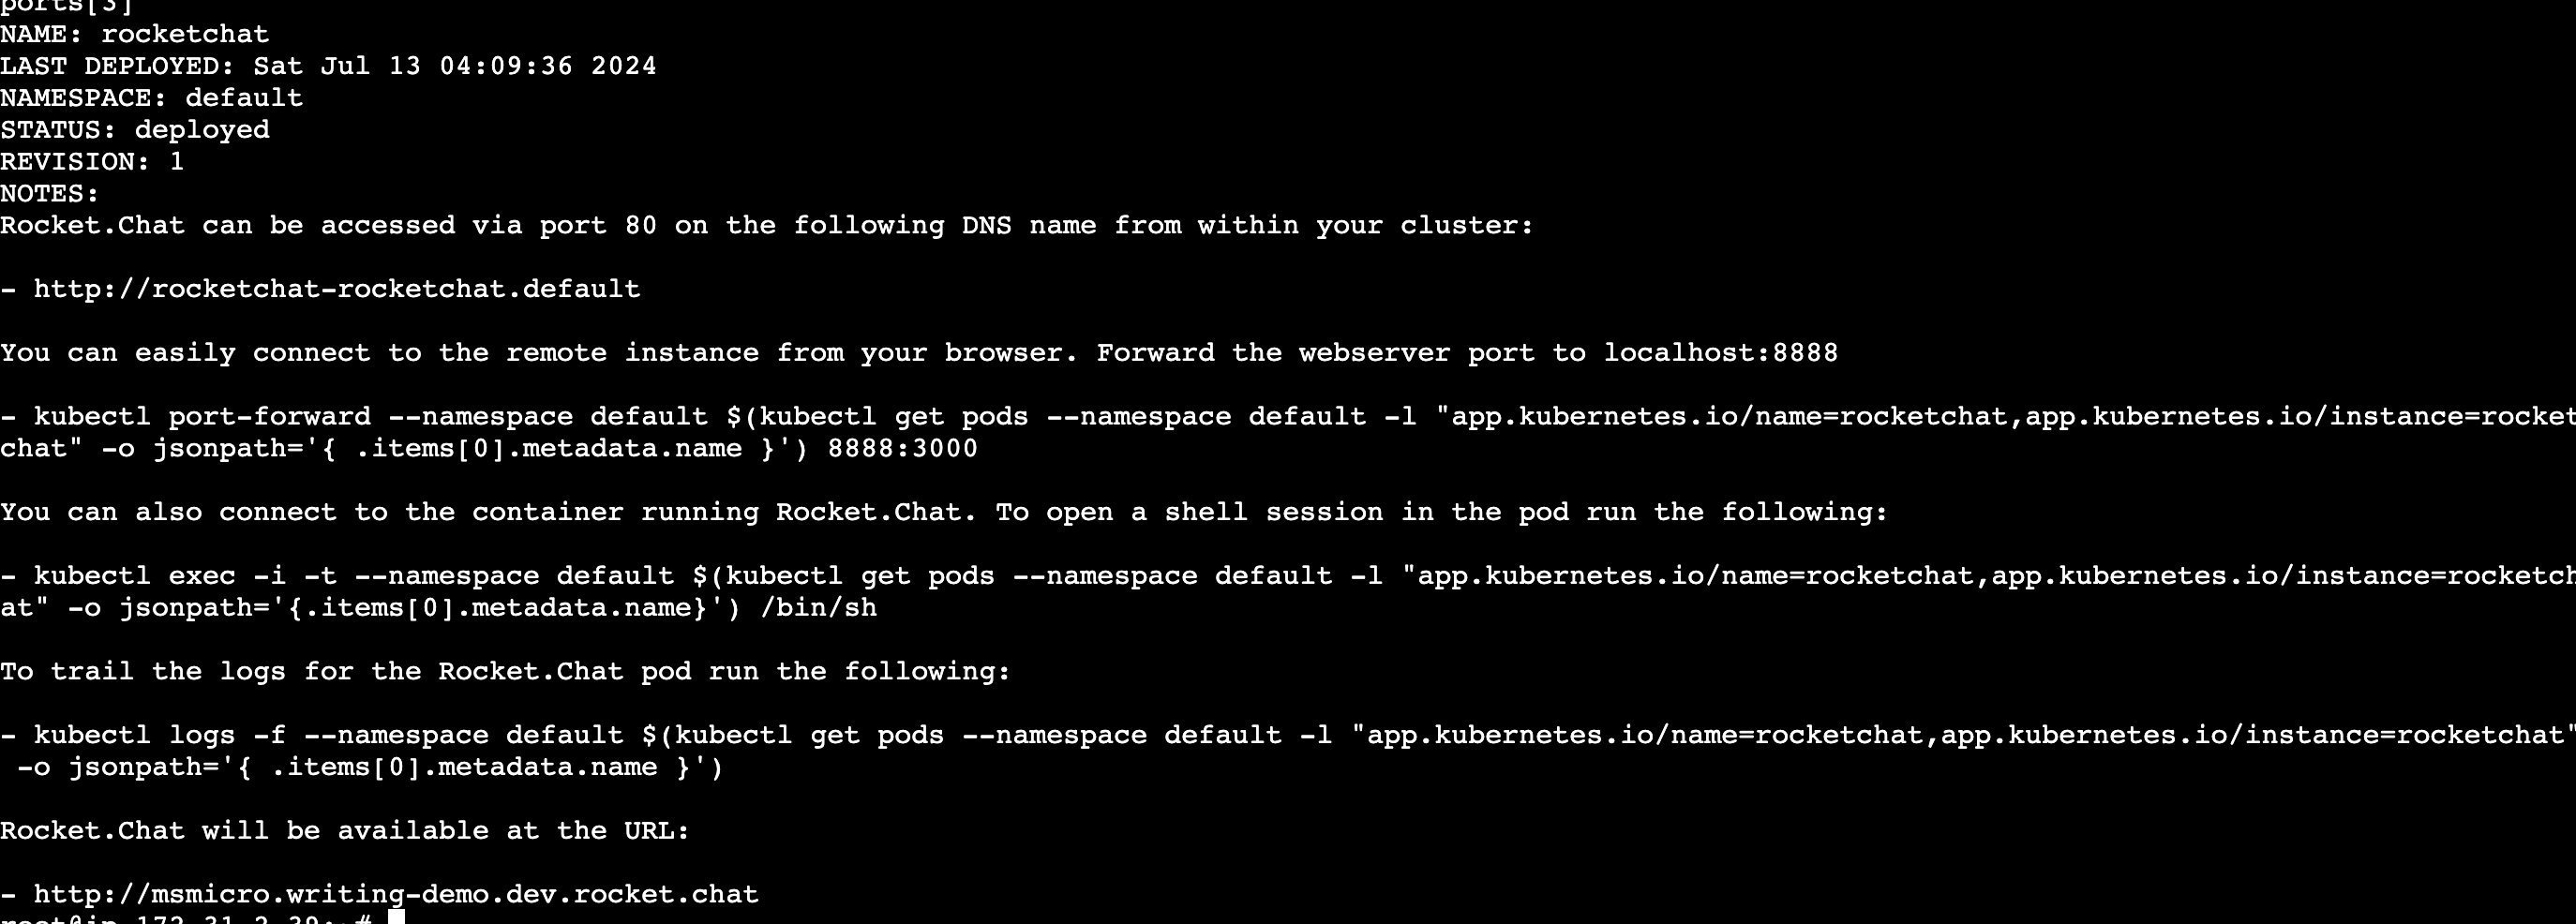
Verify that the corresponding certificates, secrets, and pods have been successfully created with the kubectl get pods command. The result is similar to the image below, depending on your configurations:
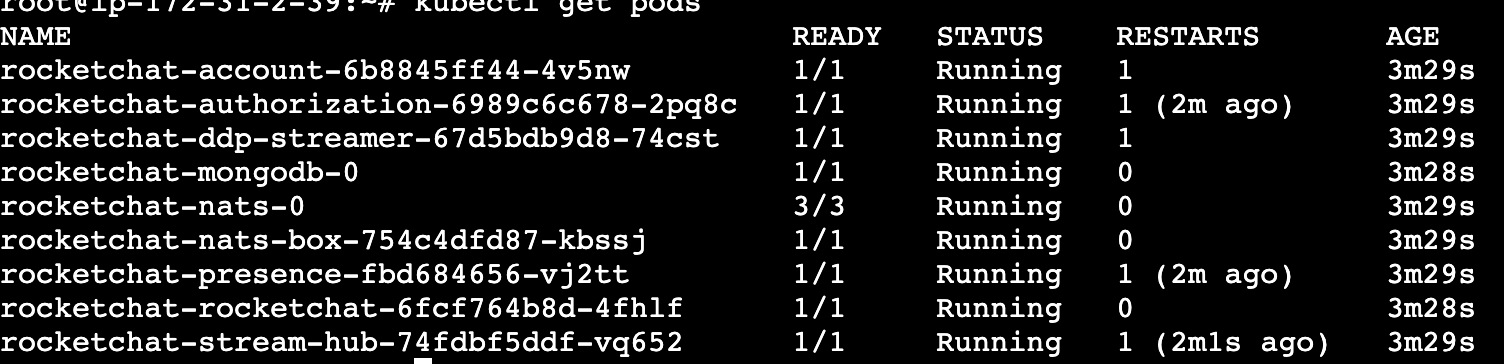
You can now access your workspace via the URL where QuickMeet.Chat was deployed (your domain), and complete the QuickMeet.Chat Setup Wizard.
Additionally, you can refer to this recording that explains how to deploy QuickMeet.Chat with microservices in a test environment.
To update your deployment or convert your monolith deployment, edit the values.yaml and use the helm upgrade command:
helm upgrade rocketchat -f values.yaml rocketchat/rocketchatVisit the Deploy with Kubernetes guide to learn more about the Kubernetes deployment procedure.
For multi-workspace deployment, please contact support.
Was this article helpful?